A construction daily log (or daily report) is necessary to track and document all major aspects of a construction project. Usually filled out by the site manager, it provides stakeholders with a detailed record of day-to-day activities, progress and noteworthy events.
Daily logs are crucial for keeping construction projects on track, but they can also be tedious and time-consuming – especially when handwritten on paper. Luckily, you can streamline and enhance this process with
FastField by building your own custom digital daily log with embedded smart features.
Below, we’ll walk you through the steps needed to build an efficient construction daily log through the user-friendly
FastField Form Builder. We’ll explain the fields and features you need for each of the following sections of your daily log:
- Date
- Project Details
- Work Performed
- Weather Conditions
- Visitors
- Equipment
- Materials
- Deliveries
- Incidents
- Meetings
- Signatures
Getting started
To get started building your digital construction daily log:
1. Sign into or sign up with fastfield
- If you have a FastField account, head to the FastField Portal. If you don’t have an account yet, start a free trial to follow along with this guide and build your own daily log.
2. Go to the Form builder
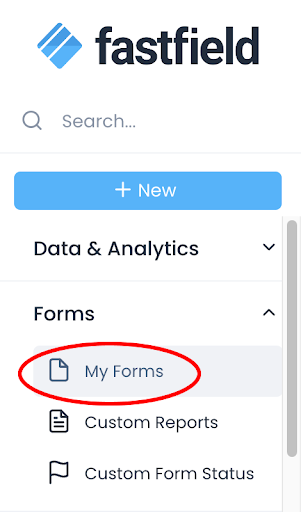
- Once you’re in the Portal, use the navigation menu to go to the Forms Page (Forms>My Forms>Forms).
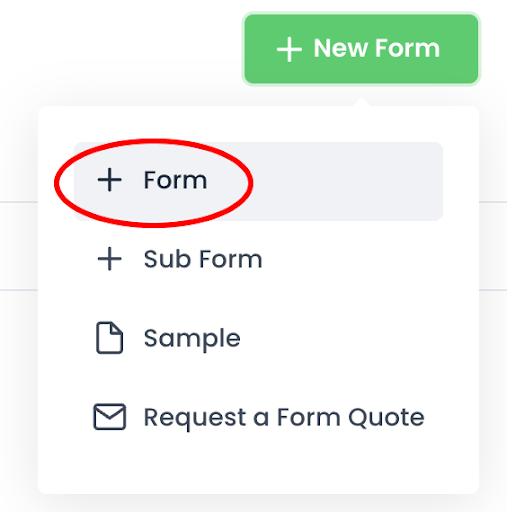
- Then, select + New Form>+Form to go to the Form Builder.
- Name your form.
Once you’re in the Form Builder, you’ll see a blank form template, which you can rename (e.g., Construction Daily Log) by selecting the pencil icon:

Date
Every construction daily log should start with the date of the entry for quick reference. You can streamline and even automate this process on your form.
#1: Utilize a mobile forms platform
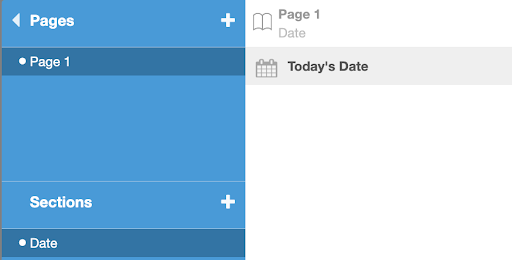
- Select the blue Pages/Sections tab.
- Under Sections, rename Section 1 to Date (or your desired name for this section).
#2: Add the Date/Time field and rename it Today’s Date.
- Select Date/Time from the Add Fields menu on the left. This will add it to your form.

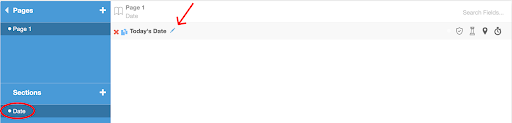
- Select the pencil on the field to rename the prompt (e.g., Today’sDate).
#3: Configure your settings
Use the Date/Time Settings menu on the right to enable a variety of helpful options:
- Default to current date: Automatically inputs the current date
- Default to current date: Automatically inputs the current date
- Default to current date: Automatically inputs the current date
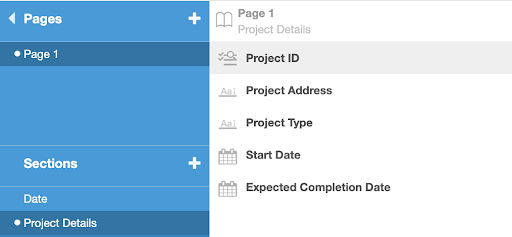
Project Details
This section is for general information about the project, such as the details shown below. This basic information is useful for recordkeeping, context and even legal purposes.
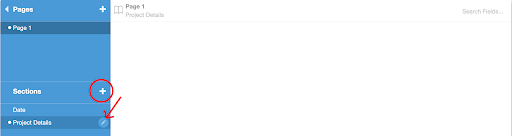
#1: Create a new section titled Project details
To add a new section:
- Select the + button in the blue Pages/Sections tab
- Default to current date: Automatically inputs the current date
#2: Add Text Fields
Add as many text fields as you need to collect necessary project details. For short, one-line entries, add the Text field to your form.

Add as many text fields as you need to collect necessary project details. For short, one-line entries, add the Text field to your form.

#3: Add Date Fields
For details such as the start and completion dates, add the Date/Time field.
#4: Rename text fields
Make sure to rename each field on your form to provide a specific prompt (e.g., Type of construction).
Advanced: Use Lists and Lookup Lists.
To streamline data entry for this section, you can embed drop-down lists for any of the above-mentioned fields. This way, site managers can simply select project details from a list instead of typing – saving time and reducing typos.
-
Lists
An easy way to do this is to add the List field. Then, select + Add List Items to create your drop-down list.
-
Lookup Lists
For even more efficiency, you could also use Lookup Lists. By creating Lookup Lists, users can select one item from the drop-down menu, which will then auto-populate other fields on your form with relevant data. For example, the site manager could just select the project id from a list, which would then automatically populate the site address, construction type, project name and any other related information.
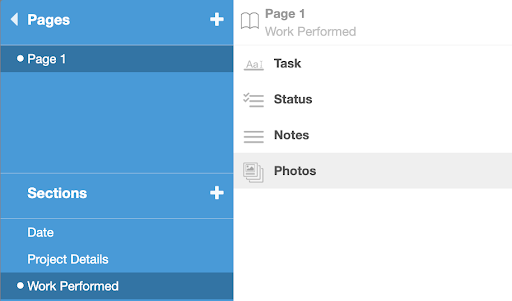
Work Performed
In this section, you’ll briefly describe all work performed during the day, as well as the status/progress of each task.
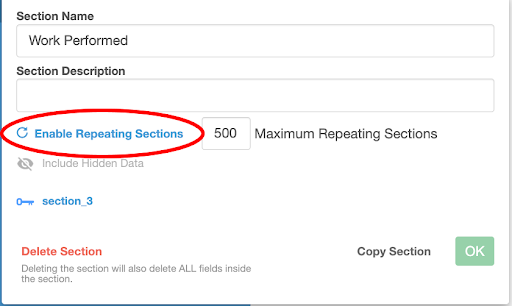
#1: Create a new repeating section titled Work Performed.
Let’s make this section a
repeating section, so that you can add as many tasks as necessary. To do this:
- Select the pencil icon next to the section name.
- Select Enable Repeating Sections.
#2: Add a Text field and rename it Task.
This is to describe a task that was worked on during the day.
#3: Add a List field and rename it Status.
Create a list of status options for users to indicate their progress with the task (e.g., Complete, In Progress).
#4: Add a Long Text field and rename it Notes.
This can be an optional field to describe or explain any notable details that emerged that day.
#5: Add a Photo or Multi-Photo field.
As an option, you may want to provide a field for photo evidence of each task mentioned for better clarity.
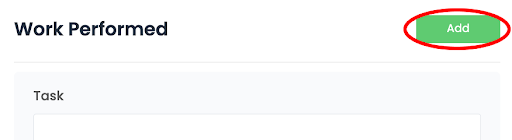
Since this is a repeating section, users filling out this section can simply enter the info for one task, and then select Add to enter the info for a new task. They can select Add as many times as necessary until all of the day’s tasks are documented.
Weather Conditions
Weather can impact on-site safety, quality control and scheduling. It should be documented for analysis, historical records and claims/disputes. Make sure your daily report has fields to gather the following info:
- The day’s weather conditions
- Any mitigating actions
- Photo evidence

#1: Create a new section titled Weather Conditions.
#2: Add an Option List field and rename it Weather Conditions.
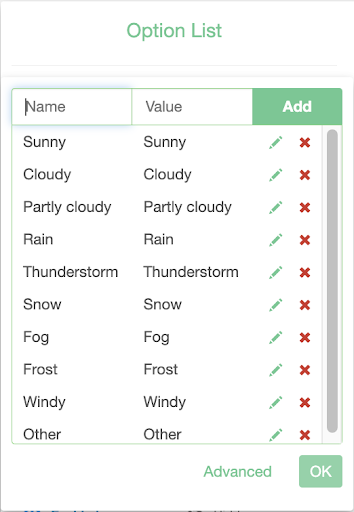
Create a checklist of weather conditions for the user to easily choose from. To do this:
- Select + Add List Items from the Option List Settings menu to create your list (e.g., Clear, Overcast, Rainy, Foggy, Windy, etc.).
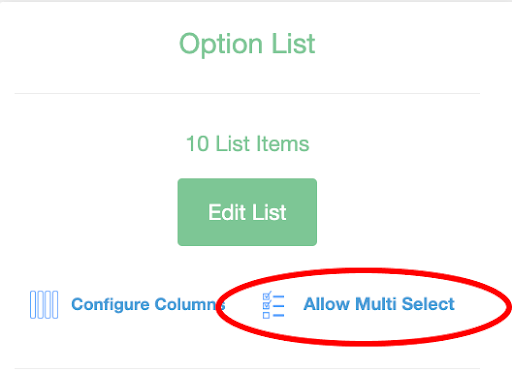
- Select Allow Multi-Select so that users can check more than one condition.
Advanced: Add
Other to your list. Then, if the user selects
Other, use
field rules to have a
Text field appear, allowing them to note any weather types that are not listed.
#3: Add a long Text field and rename it Notes
This can be used for a description of any weather-related delays or mitigating actions.
#3: Add a Photo or Multi-Photo field.
This can be used to capture visual evidence of the weather or mitigating actions.
Visitors
Next, you’ll need to document any visitors (non-crew) who came to the construction site this day. Since construction projects have multiple stakeholders (contractors, clients, inspectors, etc.), it’s important to keep track of who visited the site for accountability, safety and management purposes.
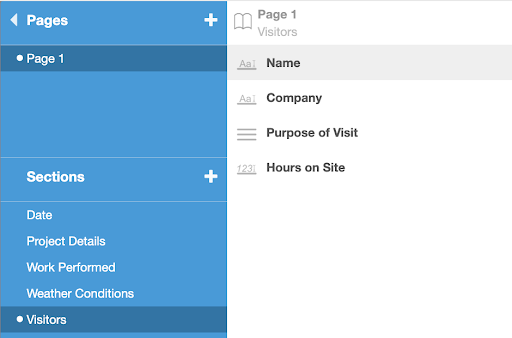
#1: Create a new repeating section titled Visitors.
Make this section a
repeating section, so that you can add as many visitors as necessary.
#2: Add a text Field and rename it Name
This field is to input the visitor’s name.
#3: Add a Text field and rename it Company.
#4: Add a Long Text field and rename it Purpose of Visit.
#5: Add a Numeric field and rename it Hours on Site.
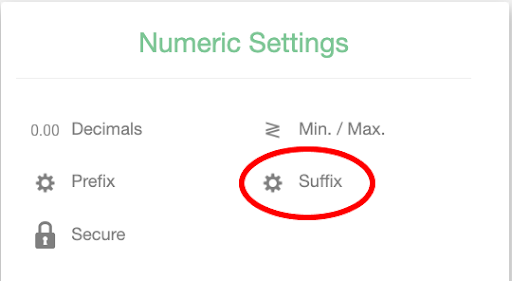
Use this field to write the duration that each visitor was on site that day. Under the Numeric Settings menu, select Suffix to add a unit of time to be displayed, such as hours.
Advanced: Some daily reports also contain a timesheet of their crew and subcontractors. With FastField, you could create a
subform for this complex section. You could also implement
Lookup Lists with
mapping to streamline the input of workers’ information and hours worked.
equipment
Note all equipment used on site and for how many hours. It’s also important to indicate the status of each equipment and if there were any mechanical or safety issues. This is all necessary for maintenance, security and resource management purposes.
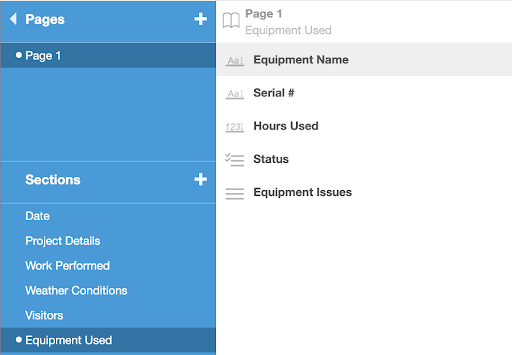
#1: Create a new repeating section titled Equipment Used.
Make this section a
repeating section, so that you can add as many pieces of equipment as necessary.
#2: Add (2) Text fields and rename them Equipment Name and Serial #.
Advanced: Use a
Lookup List to create a drop-down list of all your equipment. This can also
auto-populate the
Serial # field.FastField is also compatible with
QR code and
NFC technology, which lets you simply scan equipment and have this info pop up on your form.
#3: Add a Numeric field and rename it Hours Used.
This is to indicate how long the equipment was in during the day. Under the Numeric Settings menu, select Suffix to add a unit of time to be displayed, such as hours.
#4: Add a Numeric field and rename it Hours Used.
Create a list of statuses (e.g., On Site, Left Site) to indicate where the equipment is or even its condition. Select the + Add List Items button to create your list.
- Advanced: If Left Site is selected, create a conditional rule that shows a follow-up prompt asking what time it left the site. To learn how to use this “hide-and-show” logic, read our guide on field rules.
#5: Add a Long Text field and rename it Equipment Issues.
This is for a description of any equipment concerns.
- Advanced: Use the Yes/No field to ask if there were any equipment issues. If No is selected, use field rules to have a follow-up Long Text prompt appear asking for a description (and even photos) of the issue.
Materials Used
Document inventory usage for the day. This is helpful for material management, as well as theft and loss prevention.
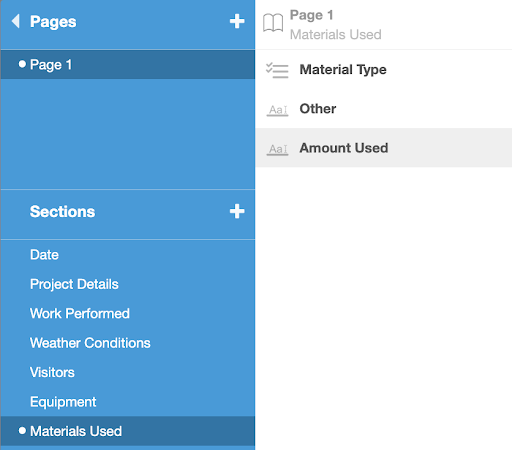
#1: Create a new section titled Materials Used.
- Make this section a repeating section, so that you can add as many materials as necessary.
#2: Add a Text field and rename it Material Type.
- Alternative: To streamline this entry, add a List field for users to choose from a drop-down list of materials. You could also have an option on your list named Other that, when selected, shows a Text field for the user to manually enter the type meeting. This can be accomplished using field rules.
#3: Add a Text field and rename it Amount Used.
This is to enter the total amount of a particular material used that day. Since each material may have a different unit of measurement (e.g., cubic yards, feet, rolls), it’s best to leave this as an open field for both numbers and alphabetic characters.
- Alternative: FastField does have an option to add a suffix for units of measurement when adding a Numeric field. If you know the unit that will be used, just select Suffix from the Numeric Settings menu and enter your desired measurement.
#4: Add a Text field and rename it Amount Remaining:
Using the same process as Amount Used, add a field to note the amount remaining of the material used.
Since this is a repeating section, users can simply select Add when filling out this section to document as many materials as needed.
Deliveries
Use this section to keep an accurate record of all deliveries to the site during the day. This is important for verification, inventory management, cost control and accountability.
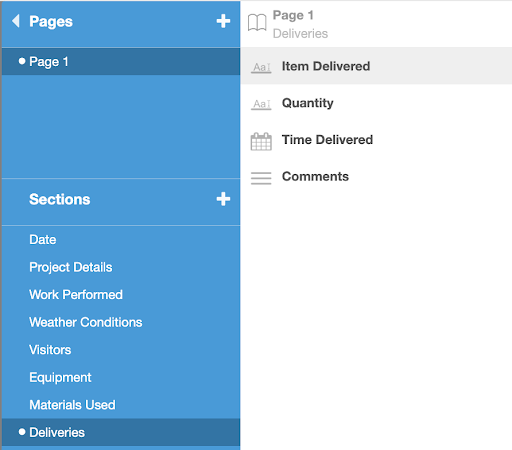
#1: Create a new section titled Deliveries.
Make this section a
repeating section, so that you can enter as many deliveries as necessary.
#2: Add a Text or List field and rename it Item Delivered.
This is to indicate any material that arrived on site that day.
#3: Add a Text field and rename it Quantity.
#4: Add a Date/Time field and rename it Time Delivered.
To set up a time field:
- Go to the Date/Time Settings menu on the right after selecting the field on your form.
- Select the green Date button and change the format to Time.
- You can change the format to a 24-hour format by selecting 24 Hour Clock.
#5: Add a Text field and rename it Comments.
This field can be used to note any delays, issues or other details about each delivery if necessary.
Since this is a repeating section, you users can simply select Add when filling out this section to add more delivery entries.
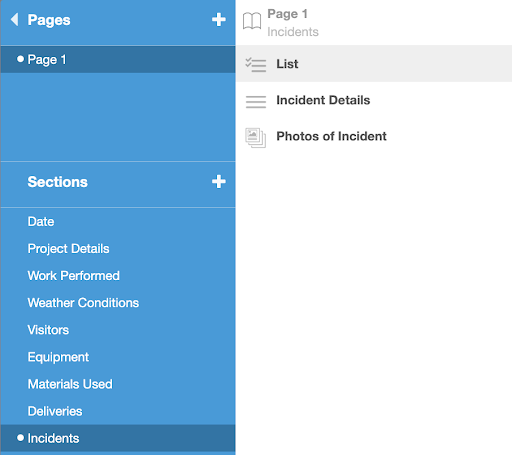
Incidents
For this section, include any accidents, safety issues or other noteworthy events. It’s important to provide a detailed description of the occurrence, as well as the steps that were taken to resolve the incident. This is not only necessary for safety and compliance records, but for safety analysis and prevention, as well.
#1:Create a repeatable section titled Incidents.
Make this section a
repeating section, so that you can enter as many incidents as necessary (hopefully not too many!).
#2:Add a List field and rename it Incident Type.
This is for users to indicate any incidents that occurred that day or to select None if no incidents occurred. Possible options for your list include: Accident/Injury, Delay, Safety Violation, Material Deficiency, Environmental Concern, Permit Issue, Dispute, Miscommunication, QC Issue, Security/Theft.
- Advanced: Use field rules to hide the rest of the fields in this section if None is selected.
#3:Add the Long Text field and rename it Incident Details.
#4:Add the Photo or Multi-Photo field and rename it Photos of Incident.
This is to collect any necessary visual evidence of the incident.
- Advanced: Use field rules to hide the rest of the fields in this section if None is selected. To keep managers aware of incidents in real time so that swift resolution can take place.
Meetings
Document all on-site meetings that took place during the day. This helps improve accountability while creating a historical record for project management. It could also be used as evidence for disputes and claims.
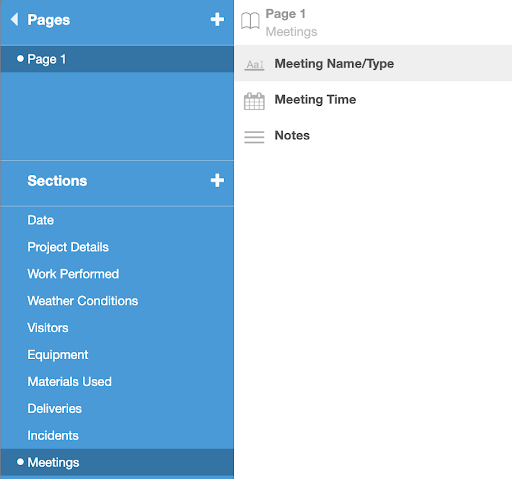
#1:Create a repeating section titled Meetings.
Make this section a
repeating section, so that you can enter as many meetings as needed.
#2:Add a Text or List field named Meeting Name/Type.
If using the List field, create a list of possible types of meetings to choose from.
#3:Add the Date/Time field and rename it Meeting Time.
Be sure to change the format from Date to Time in the Date/Time Settings menu.
#4:Add the Date/Time field and rename it Meeting Time.
This is to capture notable points or a brief summary of the meeting.
Since this is a repeating section, the user can simply select Add to input additional meetings.
Signature
It’s important to collect the signature of the preparer of this daily log. This will hold them accountable and responsible for the information submitted.
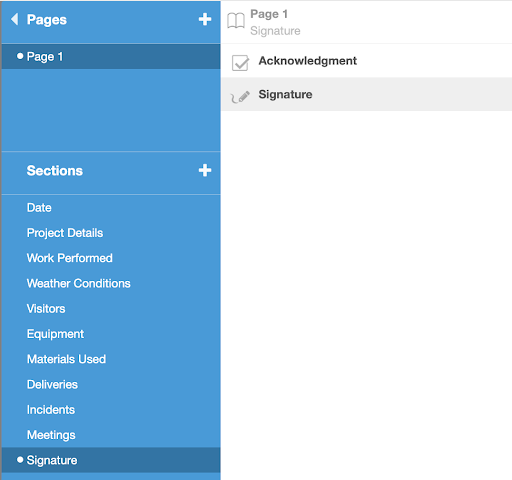
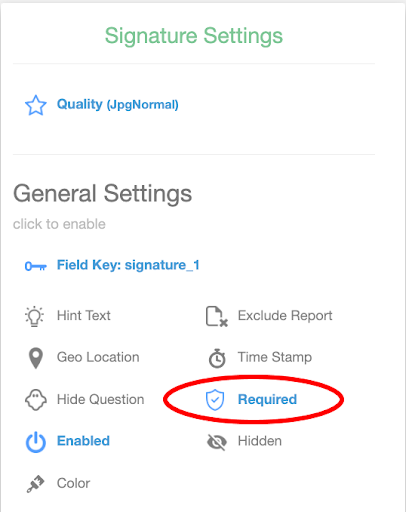
#1:Add a Signature field.
This allows the form respondent to enter an e-signature directly on the form in the app. Select Required to make this field mandatory.
#2:Optional: Add an Acknowledgment field.
You may also want to add an acknowledgment statement before or after the signature:
I hereby acknowledge that I have reviewed and verified the contents of this Construction Daily Log and affirm that the information provided is accurate and complete to the best of my knowledge.
To do this:
- Add the Acknowledgement field to your form.
- In the Acknowledgment Settings menu under Value, enter your desired statement.
Try It Free